Sunday 27 February 2011

Naps 26.2.11

This last couple of weeks have been a complete washout as regards gaming and painting my wee men as I have been living off 4-5hours sleep a day. I feel like the little lass out of the exorcist with my head spinning around. Thankfully I got a couple of days break from my crazy schedule and with a bit of luck JP had arranged a game of Naps down at our club. Worked out lucky for both of us in the end as the lad who was meant to be playing JP decided not to turn up and didn't bother to contact him either.

So JP let me know there was a game on and I put out the feelers to see who else was interested and we ended up with 5 players in all.

Robert and Von Hannah played the Prussians while JP, Billy and myself played the French.

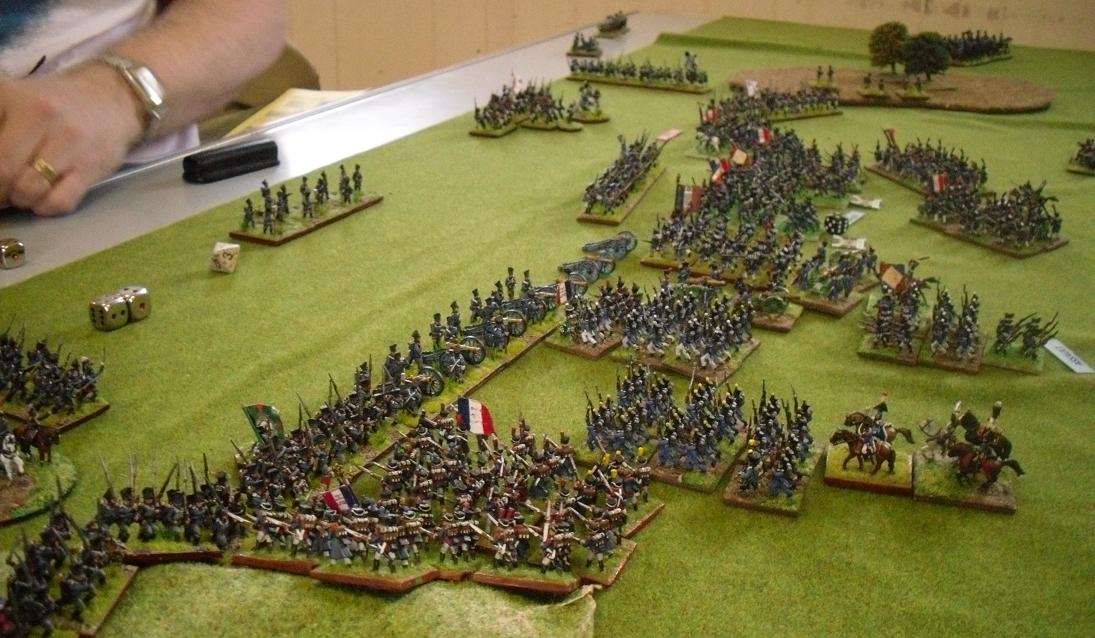
The Prussians were defending for the day with JP, Billy and myself popping out to have a little discussion about out route of attack. It was decided that Billy and JP would try to punch a whole in Von Hannah's line and I would use my 2 cuirassier regiments and an infantry brigade to hold the Prussian right flank at bay.


Robert was in charge of the Prussian right with a couple of brigades of infantry and a couple of cavalry regiments (1 light and 1 landwher). So my cuirassiers should have the upper hand.

Robert seemed set on an aggressive approach so my engage orders were switched to assault and my cavalry took the fight right to Roberts advancing troops.
I rolled a double six in 1 melee and high in the other so the Prussian cavalry on the left was pretty much taken care of.

With the resulting rolls my cuirassiers returned to their own lines to sort themselves out.


Meanwhile my infantry steadied itself to hold the flow of advancing Prussians, however their eyes were firmly fixed on trying to stem the flow of Frenchmen smashing into the Prussian centre.

Despite Von Hannah's heavy cavalry chasing away JP's light cavalry on the Prussian left and him rolling an incredible number of way above average dice (with his solid metal dice that we are sure he got from loadeddice.com!) eventually the French battalions managed to punch a huge hole in the Prussian centre and a French victory was declared!!!

A good game and I'm sure enjoyed by all even if we were a bit rusty. Figures were from the collections of JP, David P and my own.

Sunday 13 February 2011

Bavarian Workbench 4

I have been putting together and painting my 1st Bavarian light infantry battalion for the 1812-13 period (5th Butler) and although it has been a good bit of work I have been really enjoying doing them and wanted to share how they are coming together.

There are a good selection of figures from the AB Bavarian skirmishers but I wanted to add in some different figures to make the unit look unique.


In all there are 8 head swaps and some other fine details like trousers added to the figures who come with gaiters.

The additional figures I have added come from the Bavarian casualty set a sapper from the fantassin range and also some figures from the AB Austrian and Saxon range (some are very close to the Bavarian uniform).

I have been thinking of the best way to make a hornist for my lights. I had converted a fantassin Bavarian flag man but when I picked up some Saxon casualty figures this guy stood out. A simple head swap and his musket removed and his horn added with some fuse wire with a finer wire twisted to form the cord. I still have to finish of the tassels and tidy the main horn part.


I enjoy doing these little conversions as much as painting the figures. I'm not 100% sure if this is the best way to make the horn but until I bump into someone who can point me to a better way this will have to do. It also gives me a good bit of practice as I would really like to try my hand at sculpting my own 28mm figures on day.

Monday 7 February 2011

Bavarian Foot Artillery

I know I said I would be doing a Bavarian light infantry battalion next but these little guys have been glaring at me from their little take-away box desperate to be finished so I dug them out, cleaned them up and got stuck into them.

So 3 guns and crew, no problem they should be easy to do I hear you say? well no these guys have actually been a little bit more complicated than they look! 1st off I bought them as part of an already painted job lot on ebay from a very helpful guy from Germany (who very kindly threw in some extra Bavarian casualties). For speed I planned on repainting them to my own style without stripping them so I cleaned them up based them on 40mm x 40mm bases and applied the sand around them (I always mount my artillery before painting as it helps me get started seeing them in position).

Anyway I blocked in the black to cover the areas I felt needed touched up and painted 1 figure to test out the colours (it was a bit difficult as they were painted pretty thick but it seemed ok so far). However when I tried painting more they just started to irritate me as the finish just was not what I was looking for as the paint was far to thick and obscuring the detail so frustration got the better of me and I tossed them in the "simple green" to strip them down (bases and all!).

So they lay there for a few days before I fetched them out and cleaned them off and remounted them on new bases ready to paint. I bought the Austrian guns separately unpainted and I had undercoated them a few weeks back so all I had to do was paint the crews.

I wanted a rich looking blue similar to the many pictures I have seen of the Bavarian artillery uniform and decided on using the Foundry French paints but with a little alteration. The figures were undercoated in black and then I blocked in a mix of Prussian blue and French blue. I then used the French blue as a highlight and then to finish off I used French blue light on the raised area. The colour is very effective to my own eyes and much richer than the test figure I did. The only problem I can see is it's not so easy to see the difference in shades from a distance so I may skip a stage when it comes to doing my Bavarian position battery?

When it came to reds again I wanted to produce something close to the colours I had seen so I went for Formula P3 skorne red for the collar, cuffs, etc but it was a little dark and flat so I highlighted them with a lighter red and then a very soft highlight of Vallejo vermillion (I feel this worked much better).

The AB figures are great as usual with so much fine detail to paint (although you will see I have added a couple of bandages across eyes that had a little flash and I also decided to add trousers to the crew who had gaiters). The little buttons on the lapels are especially superb! To be honest I wasn't sure how these guys were going to turn out right until the very end. I felt the same when painting the Bavarian infantry too. I believe it is because of the Raupenhelm as I leave its metal work, plume and national symbol to last and it is only when this is done that you see the complete figure.

So in the end I am pleased with these guys. The blue looks pretty good and the figures are neat and tidy. And at last my Bavarian limber has a reason to exist!!!!


I also learned some good lessons for the future about buying job lots that are already painted. So next up it should be my Bavarian light infantry battalion . . . Famous last words!!!

Tuesday 1 February 2011

Russian Position Battery

It's funny I have always struggled painting artillery yet this is my 2nd Russian six gun battery within a couple of months! I think it is the different elements that put me off artillery as I kind of loose the rhythm when I think of switching to guns after painting figures.


I have always loved the look of the late war Russian foot artillery uniforms with kiwer. I remember visiting my brother in Hong Kong when he was posted there back in the early 90's. I was off on a walk around town myself when he was busy 1 day and I stumbled upon a little shop which to my surprise had a Russian artillery gun and crew all painted up and based in a little diorama (I think in 54mm?). It must have caught my imagination as I decided I definitely wanted 1 for myself. However soon after Napoleonic figure painting left my mind and I never did get 1 for myself.


Thankfully I have finally added some AB Russian foot guns to my collection. It's strange as I already painted an Old Glory Russian foot battery but it was only when painting the AB figures that my memory kicked in?


I have to say that I cut some corners when painting these guys to get them finished quicker. I usually do at least 2 shades on the coat but I only used Vallejo Russian green over a black undercoat this time. I had thought about using the foundry Russian greens for the coats but I have found they make the figures very dark in 15mm. I know they are the closest shades to the real uniforms but I was a little disappointed with how dark my horse artillery gunners turned out.


I used Formula P3 skorne red (brilliant colour) on the shako cords as it is the best match I have found to the picture of the Russian artillery man in the osprey Napoleonic artillery equipment book (Always like that colour). The shoulder straps are vermillion.


I recently realised I messed up on all my Russian guns and limbers. Originally I meant to do my gun carriages in a deeper green with a different hue that I had used before on a 25mm Russian limber however I forgot and cracked on adding a little lighter shade to the Vallejo Russian green. I won't be repainting them now but I think I will try it out on my next Russian artillery battery and limber.

Next up Bavarian light infantry

Lt. Hausmann Finished

I was taking some pictures of my finished Russian artillery battery and thought I would get some snaps of my Bavarian brigade command with the grass added just to tick it off my list.

Nothing really to add about these guys as I have already shown them a couple of posts back with plenty of text on who they are.

Really chuffed with the cloak and the sash for 1st efforts.